Sunday, 22 March 2009

happy mother's day; brioche and lemon curd macaroons

the sun has been shining all weekend on the south coast, and a wander along the sea-front was significantly improved by the spotting of a rogue giant bubble! I have been on a bread baking adventure this week, on Wednesday I made cider vinegar english muffins (yum), and for Sunday morning I prepared my mum's favourite...Brioche!
On my sea-front wander I also found some luscious lemons which were just to perfect not to buy; the majority were used up in an exceedingly delightful (and rather large) lemon layer cake. This did however leave me with a vast amount of egg whites, and what else could I make but some zest lemon macaroons, filled with lemon curd of course!
The first time I attempted lemon curd it was a complete and total disaster, now having successfully made two batches I have decided to blame the recipe and happily recommend the below:
Lemon Curd
Ingredients
2 large egg yolks
1/3 cup granulated sugar
1/4 cup fresh lemon juice
2 tbsp (28g) unsalted butter, softened
pinch of salt
Method
1. Whisk the yolks and sugar together in a thick bottomed saucepan until combined
2. Whisk in the lemon juice, butter and salt
3. Cook over a med-low heat, stirring constantly with a wooden spoon, for 5-6 minutes until the mixture turns opaque, thickens and coats the back of a teaspoon. Do NOT let it boil.
4. If you have rogue lemon pith in the curd then pour through a fine sieve into a small bow
5. Cartouche (press greaseproof paper to the surface) and allow to cool, then refrigerate until needed
Lemon Macaroons
Ingredients
180g finely ground almonds
240g icing sugar
140g egg whites, aged - separate from the yolks at least the night before and bring to room temp before using
2g salt, ground
80g granulated sugar
finely grated lemon zest
few drops of yellow food dye
Method
1. Sift together the almond flour, icing sugar and salt in a large bowl. Set aside.
2. Whip the egg whites until rather fluffy, then continuing to whip, gradually add the sugar & a few drops of food dye, until stiff but not dry peaks form
3. Add the dry ingredients and the lemon zest to the egg whites; fold with a spatula until a shiny mass forms
4. Fill a piping bag with a 1/3" tip and pipe small rounds (about 1 1/2" diameter) onto baking trays lined with baking paper (I pre-cut out the baking paper and pipe out all the batter first, this does cover the entire kitchen with macaroons but it makes the process much easier!)
5. Leave the macaroons to dry for about 30-45 minutes, you want the tops to be dry when you touch them
6. Preheat the oven to 180C; place one tray in the oven at a time and reduce the temperature to 145C, bake for 10 minutes then rotate and bake for another 5
7. Remove from the oven and cool - I remove mine from the baking paper immediately as I find the can stick but experimentation is key!
8. Once cool match up you macaroons and sandwich together with your filling.
I filled mine with my lemon curd that I had mixed into some basic buttercream (butter and icing sugar beaten together until fluffy, then beat in the lemon curd)...

Sunday, 15 March 2009

red nose day, cupcakes & cookies

my mum asked me to bake some goodies for her to sell for red nose day; on offer were Red Nose Sugar Cookies, Iced Vanilla Cupcakes and Red Velvet Cupcakes (no prizes for guessing which ran out first!)...and £155 was rasied for comic relief!

Monday, 9 March 2009

almond croissants and a sunday morning

the sun has appeared! and with it the tweets of various spring time birds, which can be heard through my open (!) kitchen window. what else could complete this nice twee scene that the weekend papers, a nice cup of hot coffee and some freshly baked almond croissants....
yum. happy sunday everyone!

Sunday, 8 March 2009

egg custard tarts

the 8 egg yolks had now been glaring at me from their ice cube tray compartments for 2 days now, a necessary but unfortunate by product of this cake, and at 10pm tonight I finally decided what to make. Egg custard tarts are simply awesome, they instantly take me back to small childhood memories of being allowed one as a treat from the bakers in the village I grew up in (ha, no, I did not grow up in a Famous Five book...I wish!). A nice melt-in-the-mouth sweet pastry, a firm but silky custard filling, topped with a sprinkling of nutmeg...mmmmmmm...and here is how...
Ingredients
Pastry
90g cold butter, diced
125g plain flour
25g icing sugar
1 egg yolk
ice cold water
(I use a food processor to make the pastry so this is the method I will put here; this makes enough to line 1x9" case, or 5x4" cases)
Filling
4 large egg yolks
1/2 cup caster sugar
2/3 cup milk (I used skimmed so any fat content is fine)
ground nutmeg
Method
1. Put the flour, icing sugar and cold butter in the bowl of your food processor, with the knife blade in place. Pulse until the mix resembles very fine breadcrumbs.
2. Add the egg yolk and pulse again to incorporate
3. Add ice cold water a dribble at a time whilst pulsing, you only need a little, until the pastry comes together and forms a loose ball
4. Wrap the pastry in baking paper and pop it in the fridge for 20 mins to chill
5. Preheat your oven to 180C/350F and move the racks to the middle
6. Grease your tart cases (or you can use a muffin tin), flour a clean surface and roll out your pastry
7. Line your chosen cases and trim the excess pastry off
8. Scrumple up some baking paper and line the cases, fill with baking beads - push to the edges to stop shrinkage
9. Blind bake the cases for 15 mins, then remove the beads and paper and cook for another 5-10 minutes. This will vary depending on the size of case you are making.
10. Whilst the cases are baking make the filling by first hand whisking together the egg yolks and sugar until the sugar is pretty much dissolved
11. Whisk in the milk, try not to make the mix too foamy
12. Fill your baked cases to the top with the egg mixture and dust the tops with nutmeg
13. Pop back in the oven for 15-25 minutes (again dependent on tart size) until the filling is set but still a bit wobbly
14. Cool completely on a rack before removing from the baking cases

Thursday, 26 February 2009

flourless poppy seed cake

there comes a time when even I can no longer stand to see the glum look on the gluten-free people on my floor at work when I take in my baked treats, and so when I stumbled across this little number on Chocolate & Zucchini I knew it had to be made. I love poppy seeds, love love love them, their flvour is so divine and this cake is ram-packed full of them, giving it a that wonderful nutty taste with every bite.
I have an odd relationship with almonds, I can not stand the taste of them, but I have been using them increasingly in my baking and find that I do like the flavour when it is not simply a block of marzipan (triple yuk). This recipe calls for Almond Butter, which blew my mind, what was this, where do I get it? A quick google later and I discovered to my glee that it is easy-peasy to make, all you need are some whole almonds. A simple toasting in the oven, then blitz them up in a food processor for a fair old while until the oil is released and the butter forms! I added a dribble of veg oil when I could see a slight gooeyness and this brought it all together into a buttery paste ball thing, success! And think of the possibilities! Cashew Butter, Pecan Butter...amazing!
Ingredients
60g butter, room temp
60g almond butter
125g soft light brown sugar
zest of one orange, finely grated
4 eggs, separated
100g ground almonds
160g poppy seeds
pinch of salt
1tsp baking powder
Method
1. Preheat oven to 180C and grease an 8" round cake pan
2. In a stand mixer bowl combine the butter and almond butter with 100g of the sugar and the orange zest; Cream for 2 minutes
3. Add the egg yolks and mix again until fluffy
4. In a medium bowl combine the ground almond and the poppy seeds, set aside
5. In another bowl combine the egg whites with the salt and baking powder. Beat until fluffy then add the remaining 25g of sugar, and beat again until the egg whites are nice and glossy (the old hold the bowl over your head trick stage of thickness -stiff but not dry)
6. Fold 1/3rd of the whites into the butter batter - working with a very light hand - then fold in half the poppy seed mix. Repeat with another 3rd of the egg whites, and the last half of the poppy seeds, and finally the rest of the egg whites. All the time working lightly so as to combine the ingredients but not to knock the air out of rht egg whites.
7. Pour into the prepated cake pan and bake for 30 minutes, or until golden brown, mine took 25 mins but my oven is quite hot. Turn the oven off and leave the cake inside for a further 10 minutes.
8. Remove and leave to cool for another 10 minutes, then loosen and unmold from the pan, leaving to cool completetly before glazing*
*the glaze - which I forgot to do...whoops:
30g icing sugar
2tsp fresh organe juice
-mix and pour over the cake, leave to set.
I think it is a good idea to glaze as the cake does get a bit drier the following day...so next time I will endeavour to remember...

Sunday, 8 February 2009

red velvet cupcakes with vanilla cream cheese frosting

I blooming love these cakes, and this was my first time of making them into cupcakes, and most pleasing was the result. I ended up making two batches in one week, and did eat quite a few myself, whoops! I used the recipe here for the batter and the frosting....this time I beat the frosting LOADS and I added some vanilla seeds scraped from 1/2 a pod to the mix as well, and lo I had a nice thick pipe-able frosting! Happy days. The first batch, for the team meeting... The second, for an order....and my tum....

carrot and ginger cupcakes with cream cheese frosting

Cream cheese frosting has become a nemesis of mine, along with chocolate chip cookies, I feel the intense desire to conquer and perfect it. It just never gets as thick as I want it, and this annoys me more deeply than when you spend time peeling a satsuma only to find it is as bitter as bitter can be (this is one of the more upsetting things in life).
And so, to practice the creation of the perfect cream cheese frosting I commenced to make two cupcakes that required this topping to take to a team meeting...ginger & carrot and red velvet. I think that I can be happy with my results, on the carrot cupcakes I spread the topping so the thickness was not too much of a necessity but I piped it on the red velvet ones and it did stay in a nice little pile, so this was truly pleasing.
For the carrot and ginger cupcakes I adapted a recipe from chockylit, I did not use fresh or candied ginger, but instead used stem ginger (in syrup) which I absolutley love and think has the same, if not more, intensity of fresh and the sweetness of the candied. It worked very very well so if you can get this I would recommend trying it...someone at work said 'mmmm, these are great, i love garlic'...which was confusing, but I decided to just smile and take it as a compliment rather than just some informatin about his dietary habits.
Ingredients - makes 30 cupcakes
1 cup pecans, toasted
1lb carrots, grated
3 large eggs
1/2 cup buttermilk
1 tsp vanilla extract
2 cups caster sugar (I used golden caster sugar as this is yummier)
1 cup vegetable oil
1/4 cup chopped stem ginger
3 cups plain flour
2 tsp baking powder
1 rsp bicarbonate of soda
1 tsp salt
2 tsp ground cinnamon
Method
1. Toast the pecans, 5mins at 180C, then chop them roughly once cooled (heh, roughly chop them - good old english language...images of you hacking and insulting the pecans run through my mind)
2. In a large bowl combine the grated carrots, eggs, buttermilk, vanilla, sugar, vegetable oil and ginger
3. In another bowl sift and mix together the flour, baking powder, bicarbionate of soda, salt and cinnamon
4. Fold the dry mix into the carrot mix until incorportated, then fold in the pecans
5. Fill cupcake cases 2/3rds full
6. Bake for about 20 minutes, then remove and cool in the pan before removing to a rack for frosting
7. Frost with cream cheese frosting

dense chocolate loaf cake

erm, yum? correct. having spent the evening at a friends watching her make this, I then immediatley commenced to bang* about in my kitchen at 11pm on my return home to create my own. This page has been bookmarked in How To Be A Domestic Goddess since its purchase and now was the time for my dreams to become reality, and what a glorious chocolatey gooey reality it is indeed.
*why oh why are kitchen cupboards designed to make it impossible to retrieve any item from said cupboard without having to remove the ENTIRE contents each time? And I always think no, no I do not need to take out every saucepan, gridlepan and fryingpan to extract one solitary loaf tin....this thinking almost always leads to the meeting of my toes and a delightfully heavy le cruset pan lid. darn, and double darn.
Anyhoo, the cake!
Ingredients
200g plain flour
1 tsp bicarbonate of soda
100g dark chocolate (high % cocoa), melted & cooled
375g dark muscovado sugar
2 large eggs, beaten
1 tsp vanilla extract
225g butter, room temperature
250ml boiling water
Method
1. Preheat your oven to 190C, grease and line a 9x5x3in loaf tin
2. In a large bowl using a hand whisk (my kitchenaid would put too much air in the batter), cream the butter and sugar
3. Add in the eggs and vanilla, beating well
4. Fold in the melted chocolate using a spatual, mix well but do not overbeat
5. Add the flour & bicarb, spoon by spoon, alternately with the water - mixing gently until you have a smooth and fairly liquid batter
6. Pour the batter into the prepped loaf tin and bake for 30 minutes
7. After this time turn down the oven temp to 170C and bake for another 15 minutes
8. Remove and allow to cool in the tin on a rack

Thursday, 22 January 2009

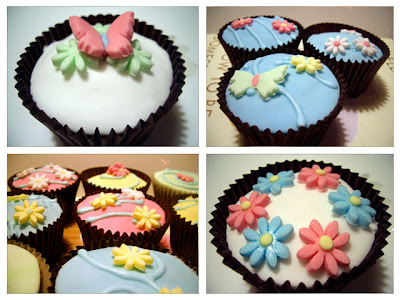
Happily Ever After Cupcakes

Lemon Truffle Layer Cake

Lemons, lemons, lemons...the basis of this (birthday) cake was built on this solid premise...from this starting point I moved onto chocolate, blates. To create the sponge I wanted a cake that could take layering and what better than a classic 1234 cake, to which I added the zest and juice of 2 lemons. To fill I made a chocolate ganache, one third of which I stole away and mixed in lemon juice to make the truffles that would top the cake. I have to say I was most pleased with the result, the 1234 sponge is light enough but sturdy enough to take the lemon flavour and still stand out against the dark chocolate ganache. And the truffles? oh yes, I'll be making those puppies again.
The Cake
Ingredients
225g butter, room temperature
2 cups golden caster sugar
4 large eggs
3 cups self raising flour
1/3 cup milk
2/3 cup fresh lemon juice
zest of 2 lemons - or just add to taste as you like
Method
1. Preheat your oven to 177C/350F
2. Cream the butter until fluffy, about 3 minutes, with an electric mixer
3. Add the sugar and continue to beat for another 6-8 minutes
4. Add the eggs one at a time, making sure to beat well after each addition
5. Add the dry and wet ingredients alternately, starting and ending with the dry mix
6. Divide the batter between 3 8" greased/lined cake pans
7. Bake for 25-30 minutes in the centre of the oven, test at 20 minutes with a knife...the layers will be thin so do not worry, once stacked it'll be a mighty cake!
The Ganache
Ingredients
11oz dark chocolate - I use 75% cocoa solids
2/3 cup double cream
cocoa powder - for dusting
3 tsp fresh lemon juice
Method
1. Finely chop 8oz of the chocolate and place in a medium bowl
2. Bring the cream to the boil in a small, heavy saucepan
3. Pour the cream over the chocolate
4. Using a whisk, stir in concentric circles - do NOT beat - until the ganache is smooth...at this point I split the mixture and added lemon juice to one lot which I then made into truffles as below....the rest I used to ice the cake layers.
5. Let it stand at room temperature for about 1 hour
6. Line two baking trays with greaseproof paper and empty out a shelf in the freezer
7. Using a piping bag fitted with a 3/8-inch tip, pipe the ganache into small mounds (about 3/4" high & 1" high)
8. Freeze to firm, for 15 minutes
9. Melt the remaining 3oz of dark chocolate in a small bowl over simmering water...set up a work station of truffles; melty chocolate, cocoa and fork, sieve over bowl & storage pot.
10. To coat to truffles; smear a small amount on a gloved hand and gently rub each chilled truffle with the chocolate
11.Toss the truffles in cocoa powder using a fork, then transfer to a sieve and shake gently to remove excess cocoa
12. Store truffles in the fridge
Assembly
Secure the base layer to a cake stand using a blob of ganache, then spread over a 3rd of the plain chocolate ganache and top with the second layer. Repeat the ganache layer, and add the final layer of cake, topping this with the remaining ganache and decorate with the lemon truffles.

Wednesday, 14 January 2009

dark chocolate and sour cherry cupcakes

sifting through the pile of dried fruits remaining from christmas I discovered two packets of sour cherries that I had totally neglected to put to festive use; and with a whole day to myself what better time to knock up a batch of cupcakes!
a cursory glance at my bible of a cupcake book secured me the below brownie-esque recipe...and lo what delights were in store!
Ingredients
1 1/4 cups golden caster sugar
100g dark chocolate, chunked
225g butter, diced
3/4 cup plain flour
1 teaspoon baking powder
4 eggs
3 tbsp cocoa powder
1 pkt sour cherries...which is 1/2 a cup!
Method
1. Preheat your oven to 177C
2. Melt the chocolate chunks with the butter, in a bowl over a saucepan of simmering water
3. Add the sugar, stir well and let this mixture cool for about 10 minutes
4. Transfer to a cake mixer and beat for 3 minutes
5. Add the eggs one at a time, beating between each addition for a 30 seconds
6. Sift the flour, cocoa, baking powder and salt, mix this in well
7. Fold in the cherries
8. Scoop into cupcake cases & bake for 25 minutes
9. Top with cream cheese frosting and a sour cherry!

Sunday, 11 January 2009

apple custard tart

upon purchasing a new food processor (eep!) I was most looking forward to using it to make pastry, having never used anything but the old fashioned hand method - albeit to great success - and lo in but a few short hand-gunk free minutes lovely pate sucree did I have! awesome.
so, the apple custard tart, from the divine Joy of Baking, is pretty easy to make but has several different sections to it so only attempt this when you have some hours to burn (bake)...
the pastry - pate sucree
ingredients
210g plain flour
50g granulated sugar
1/8 tsp salt
113g butter
1 egg, beaten
method
1. sift the flour and salt together into a medium bowl
2. in a food processor, beat the butter for a few minutes
3. add the sugar, mix well, then add the beaten egg
4. add the flour and mix until a ball is formed
5. remove the pastry, flatten, cover & chill for 20 minutes
6. roll out to 5mm thick and line a greased, 8" loose-bottomed pie dish - prick with a fork and then return to the fridge for a further 20 minutes
7. line with greaseproof paper and fill with baking beads, pushing the beads to the edges to stop shrinkage...if you have no beads then use foil, which I used to use until Father Christmas came...
7. bake in a preheated oven at 205C for 20 minutes, remove and cool
the apricot glaze
ingredients
1/4 cup apricot jam
1/2 tbsp water
method
1. heat the jam in a small pan until boiling
2. strain into a bowl to remove any lumps
3. mix in the water and use to glaze the cooled tart shell
the custard
ingredients
1/4 cup plain flour
1/3 cup granulated sugar
2 large eggs
3/4 cup single cream
1/2 vanilla pod, split length ways
method
1. whisk the plain flour and granulated sugar together in a medium sized bowl
2. mix in the eggs and stir to a paste
3. heat the cream in a small saucepan with the vanilla pod until it is just boiling
4. remove the pan from the heat ad the pod from the pan, scrape out the seeds and pop them back into the cream (you can also rinse and dry the pod, and use it to make vanilla sugar)
5. add the cream to the flour/egg paste and whisk to incorporate, set aside
the apples
ingredients
500g apples, granny smith/braeburn etc
30g butter
3 tbsp caster sugar
method
1. peel and core the apples
2. slice the apples into 1/4" thick slices
3. melt the butter in a large skillet (thick flat bottomed frying pan)
4. add the sugar and stir in, let it melt a bit into the butter over a medium heat
5. add the apples and saute until they begin to soften, about 5-10 minutes
6. set aside to cool
the cinnamon sugar
mix together 1 tbsp granulated sugar & 1/4 tsp ground cinnamon
the assembly
1. preheat the oven to 177C
2. place the cooled, glazed tart shell on a baking sheet
3. line the apples in concentric circles in the tart shell
4. carefully pour over the custard
5. sprinkle over the cinnamon sugar
6. bake in the centre of the oven for 25-30 minutes until set
now you have a choice either let it cool and bit then scoff it right down as we did for the hour was late ad the smell too tempting...or....
7. sift over a layer of icing sugar and place under a high grill to caramelise...then serve...

Wednesday, 26 November 2008

low-fat chocolate cupcakes -or- what to make when you have no butter but really want to bake

mmm low fat chocolate cakes? no. exactly thats what I think, but then when I found that my fridge was bereft of butter and not being up for going to the local shop in my pajamas (again) I found these to be a surprising triumph. Mainly because all they are is non-butter cakes; like lots of cakes...the low-fat title is rather misleading, yes, they are low in 'fats' but the volume of sugar more than makes up for that little diet factoid. Anyhoo, they are nice and here is how i did it...
Ingredients
300g plain flour
225g caster sugar
1tbsp baking powder
2tbsp cocoa powder
2 lightly beaten eggs
115ml sunflower oil
175ml skimmed milk
1tsp vanilla extract
Method
1. Preheat your oven to 175C and line a 12-cup muffin tin (you could use fairy cake cases to make more, smaller cakes)
2. In a medium bowl sift together the flour, sugar, baking powder and cocoa.
3. In the bowl of a cake mixer combine the eggs, oil, milk and vanilla. Add the dry mixture to this and beat until just combined - do not overbeat.
4. Spoon the mixture into the muffin cases - half fill the cases or you will get muffin tops (heh, a little low fat irony for you)
5. Bake for 20 minutes then remove and cool in the tins for 5 minutes; remove to a wire rack to cool completely and ice as you wish (thus negating the low-fattyness!)

scrummy chocolate swirl shortbread

another beautiful recipe from one of the best presents I ever got, these shortbreads are so simple to make and undeniably sublime to scrobble down to your belly place. They take only 20 minutes to prepare, but you have to chill the dough so they are not a super quick treat, but if you have a spare hour then they can be yours!
Ingredients
Shortbread 1
150g plain flour
1/2tsp salt
50g caster sugar
125g unsalted butter, room temp
Shortbread 2
125g plain flour
25g cocoa powder
1/2tsp salt
50g caster sugar
125g unsalted butter, room temp
100g dark chocolate, chopped into rough smallish pieces (I have used various chocolates, the green & blacks maya gold is especially lovely)
Method
1. Preheat the oven to 150C and line two baking trays with greaseproof paper
2. To make the first shortbread sift together the flour, sugar and salt. Rub in the butter until the mixture combines, knead lightly, then place in the fridge to chill for 30 minutes.
3. Make the second shortbread by following the same steps, but including the cocoa with the flour. Again place in the fridge to chill.
4. Roll out both doughs on a lightly floured surface, roll into equally sized rectangles about 1cm thick.
5. Place the plain shortbread onto a sheet of greaseproof paper and place the chocolate shortbread on top; scatter the chopped dark chocolate over the top.
6. Using the greaseproof paper, roll the shortbread like a swiss-roll, rolling with the longest side. Don't worry if it breaks or if the chocolate pokes through, all part of the rustic charm. Once you have it rolled into a log, roll it a bit more to make it longer, but not too much. Pinch in the ends to prevent the chocolate falling out.
7. If you are making this in the middle of summer, or if you have your heating on furnace settings, you may want to pop it back in the fridge to firm up a bit more...if not, proceed...
8. Using a sharp knife slice the log into 1cm thick slices. Place onto the lined baking trays and bake for 25 minutes. Remove and cool on a wire rack before scoffing lots of them with a cup of tea.

chocolate peanut butter cake

my cake day was looming at work, pondering my options I once again returned to the sublime smitten kitchen for inspiration. And this be the result...
The Cake
2 cups plain flour
2 1/2 cups caster sugar
3/4 cup cocoa powder
2tsp baking soda
1tsp salt
1 cup vegetable oil
1 cup sour cream
1 1/2 cups water
2tbsp white vinegar
1tsp vanilla extract
2 eggs
1. Preheat the oven to 175C. Line the bottoms of 2 (or 3 for super specialness, i have not three pans of the same size, I also do not have endless patience at 10pm on a wednesday...)
2. Sift the flour, sugar, cocoa, baking soda and salt into the bowl of a cake mixer (cough...kitchenaid...cough), whisk to combine them well.
3. Add the oil and sour cream, continue blending and gradually beat in the water. Add the vinegar and vanilla then whisk in the eggs until incorporated. Scrape down the bowl and beat again.
4. Divide between the prepared cake tins and bake for 30-35 minutes (longer and cooler if just two pans), or until a knife comes out almost clean when inserted. Let the cakes cool in the pans for 20 minutes, then turn out onto cooling racks and allow to cool totally before removing the paper bottoms.
The Filling - peanut butter frosting
10 oz cream cheese, room temp
4 oz unsalted butter, room temp
5 cups sifted icing sugar
2/3 cup smooth peanut butter
1. In the bowl of an electric mixer beat the cream cheese and butter together until light and fluffy.
2. Gradually add the icing sugar 1 cup at a time, mixing well with each addition - scrape down the bowl often.
3. Continue to beat until light and fluffy, for about 4 minutes
4. Add the peanut butter and beat until fully incorporated
The Covering - chocolate peanut butter glaze (make after frosting the cake)
8oz dark chocolate, broken up
3tbsp smooth peanut butter
2tbsp golden syrup
1/2 cup half-and-half...not being american I used the following substitute: 2/3 cup skimmed milk & 1/3 cup double cream
1. In a bowl set over simmering water, combine the chocolate, peanut butter and golden syrup. Heat, whisking often, until the chocolate is melted and the mixture is smooth
2. Remove from the heat and whisk in the "half-and-half", beating until smooth. Use whilst still warm, yum.
The Assembly
1. Use half the peanut butter frosting to fill the cake between the layers, then cover the top and sides with a crumb layer. Put the cake in the fridge for about 30 minutes then use the rest of the frosting to coat the cake completely...pop this back in the fridge then make the glaze.
2. Put the chilled cake on some greaseproof paper and pour the glaze over the top of the cake. Use a spatula to spread it evenly over the top; if you want it to drip down all nice the spread just to the edges so that it drips down, I smothered it totally for ease of transport to work.
3. Chill the cake until about 1 hour before serving

Sunday, 2 November 2008

red velvet cake

I have been wanting to find an excuse to make this cake since steel magnolia's, and finally an opportunity presented itself in the form of a halloween/birthday shindig! yes yes. what could be more ghoulish than cutting through pristine white icing to a blood red cake, that's right, not much!

I have spent a loooong old time googling red velvet cake recipes, well, all recipes really, but I think red v-cake has taken up a large portion of said google time. I eventually settled on the recipes posted by Smitten Kitchen, no idea how I come to choose recipes, perhaps it is the reassuring photos...? hmmm. anyhoo I forged ahead, one quick trip to the dreaded asda...who of course did not have any red food dye. I hate that stupid shop, they have no concept of stock taking. And so I braved the torrential rain that was upon brighton to run to the co-op where I bought their entire stock of red food dye, all five bottles, and returned triumphant to my kitchen.

Ingredients

Cake Batter

3 1/2 cups plain flour

1/2 cups cocoa powder

1 1/2tsp salt

2 cups canola oil – I substituted with vegetable oil to great success!

2 1/4 cups granulated sugar

2 large eggs

6tbsp red food dye

1 1/2tsp vanilla essence

1 1/4 cup buttermilk – if you can’t get this then use regular milk and add 1tbsp lemon, leave for 10mins

2tsp baking soda

2 1/2tsp white vinegar

Frosting

8oz cream cheese, room temperature

115g butter, room temperature – almost to the point of melty melty

3 cups icing sugar

1tsp vanilla extract

Method

1. Preheat oven to 170C/350F, grease and line your cake tins. This recipe calls for 3x9” tins, but I used 2x8” then cut each in half to make a 4 layer cake If you do this then reduce the heat by 10 degrees and cook for 10-20mins longer.

2. Sift the plain flour, cocoa and salt into a large bowl and set aside.

3. Place the oil and sugar in the bowl of a mixer and blend at a medium speed until well combined.

4. Add the eggs one at a time and beat well to combine.

5. With the machine on a very low speed carefully add the red food dye then the vanilla.

6. Finally add the dry mix alternately with the butter milk in three batches; scrape the bowl down and beat again to combine.

7. Place the baking soda in a small dish and add the vinegar, stir and add immediately to the batter, beat for 10 seconds.

8. Pour the batter into your prepared cake tins and place in the centre of the oven, bake for 40-50minutes – or until a skewer comes out clean when inserted.

9. Carefully remove the tins to some cooling racks, leave for 20mins then turn out the cakes (I have invested in some decent sprinform pans that make this so much easier!), peel off the baking paper and leave to cool completely whilst making your frosting.

10. Place the cream cheese and butter in a mixer bowl and beat until light and fluffy and well combined. Add the sugar and vanilla. Beat on a low speed to combine, iff too soft then pop in the fridge to harden for 15mins. Add more icing sugar if you want it to be sweeter.

Frosting Tips: If you have made two big layers then slice these in half, if not then just proceed…If you have the time then it may be a good idea to chill the cake in the fridge before frosting, it is then easier to brush off the crumbs. When icing a multi-layer cake put less icing on the bottom layers, and leave a large gap at the edge of the cake as the weight of the other layers will push the frosting outwards, and we don’t want too much oooooze now do we?! I made less frosting and then covered the cake in white fondant icing, but this is up to you!